Your gym membership expired. Your dumbbells are buried somewhere in the garage. And your arms? They’re quietly filing a complaint about being ignored. Sound familiar? Here’s the thing: you don’t need a single piece of equipment to build genuinely strong, defined arms. Your own body weight is the only tool required, and it’s more effective than most people realize.
I spent years convinced that arm gains only happened under fluorescent gym lighting with a rack of dumbbells in front of me. Then I traveled for three months straight, had zero access to equipment, and came back with arms that looked better than when I left. That experience completely rewired how I think about arm training.
So whether you’re traveling, saving money, or just hate the gym crowd at 6 PM on a Monday, this body weight arm workout has you covered. Let’s get into the nine moves that’ll make your arms burn in the best way possible.

Why body weight arm exercises work
There’s a stubborn myth floating around that you need weights to build arm muscle. That’s simply not true. Your muscles don’t know the difference between a dumbbell and your own body. They only understand tension, resistance, and time under load. And your body weight provides all three.
According to research published in the Journal of Strength and Conditioning Research, body weight exercises can produce comparable muscle activation to weighted exercises when performed with proper form and progressive overload. That means adjusting angles, slowing down reps, and increasing volume over time.
Think about it. Gymnasts have some of the most impressive arms on the planet, and they primarily train with body weight. Your biceps, triceps, shoulders, and forearms all get hammered during pushing and pulling movements that use nothing but gravity and your own mass.
The 9 best no-equipment arm exercises
Here’s the full lineup. I’ve organized these to hit every major arm muscle group: triceps, biceps, shoulders, and forearms. Each exercise includes form cues because bad form is the fastest way to waste your time (and hurt yourself).
1. Diamond push-ups
Primary target: Triceps
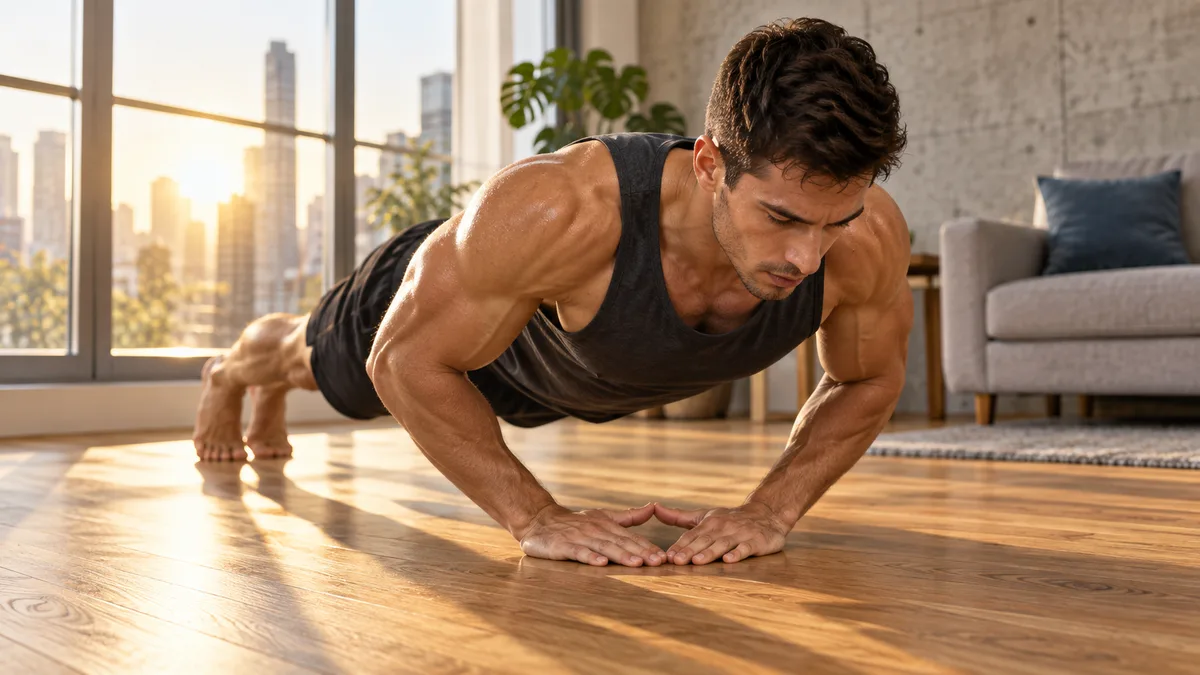
If regular push-ups are the bread and butter of body weight training, diamond push-ups are the spicy upgrade your triceps desperately need. Place your hands close together beneath your chest, forming a diamond shape with your thumbs and index fingers. Lower your chest to your hands, then press back up explosively.
The narrow hand placement shifts the workload dramatically onto your triceps and inner chest. A study from the American Council on Exercise (ACE) ranked the triangle (diamond) push-up as THE single most effective triceps exercise, beating out even triceps kickbacks and dips. Let that sink in. No equipment needed for the king of triceps exercises.
- Reps: 8-15
- Sets: 3-4
- Pro tip: If these feel too hard, start on your knees. No shame.
2. Pike push-ups
Primary target: Shoulders (anterior deltoids)
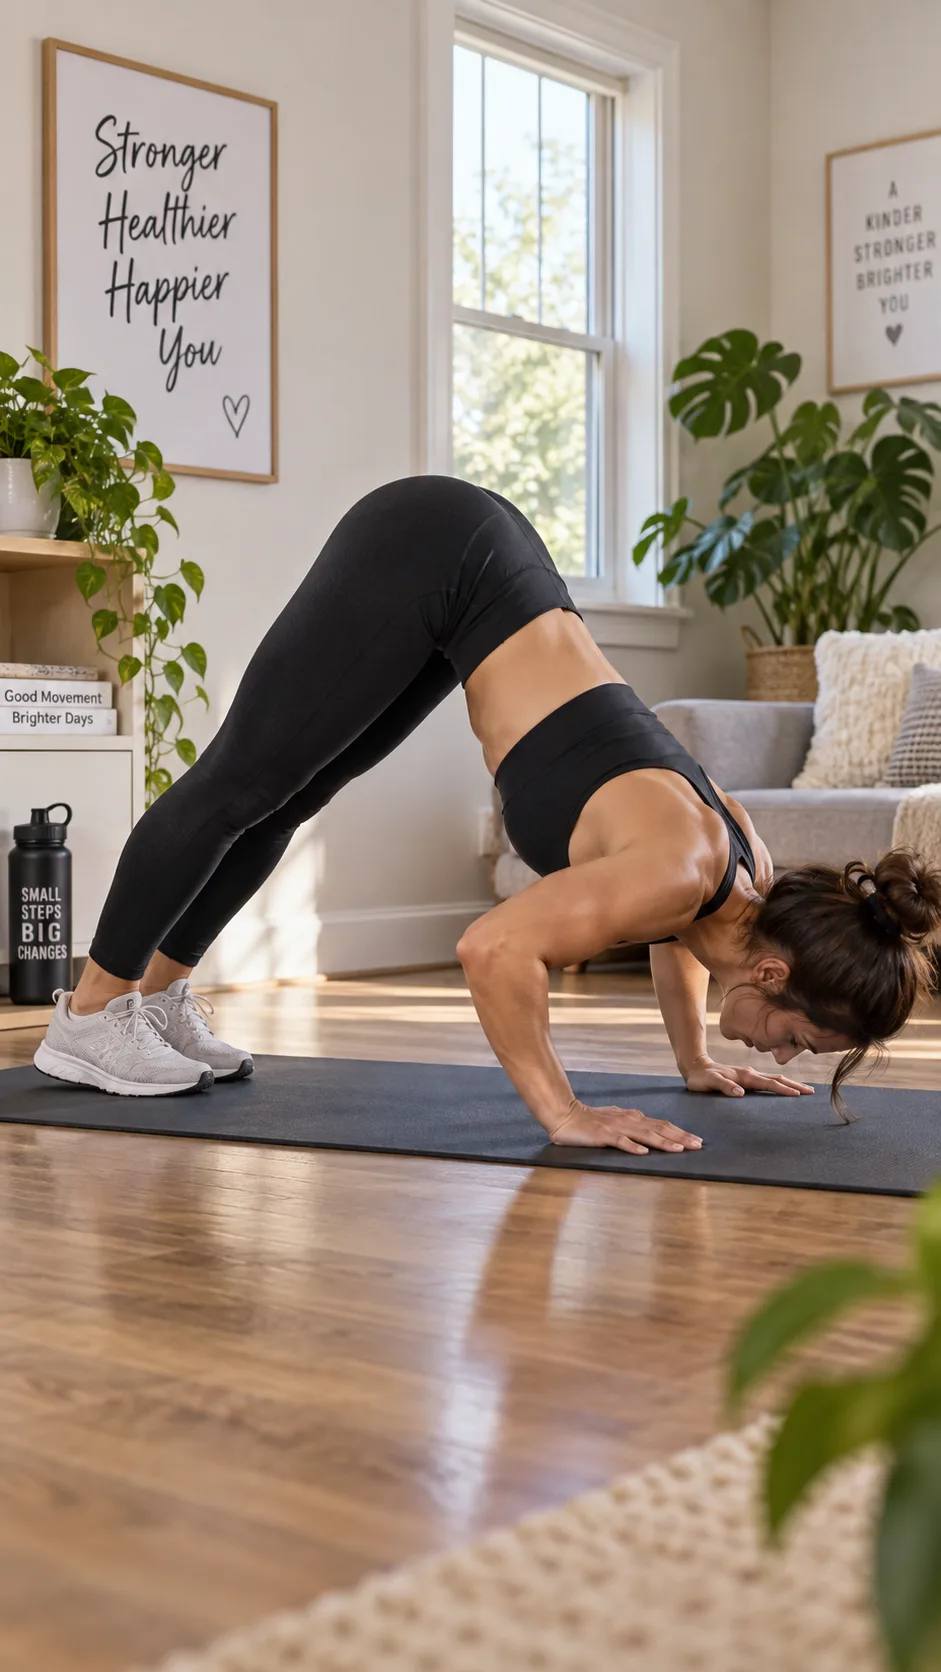
Want boulder shoulders without a shoulder press machine? Pike push-ups are your answer. Start in a downward dog position with your hips high in the air, hands shoulder-width apart. Bend your elbows and lower the top of your head toward the floor, then press back up.
This exercise mimics an overhead press using your body weight. The steeper the angle (elevate your feet on a chair for extra intensity), the harder your shoulders work. These are non-negotiable if you want well-rounded arm development.
- Reps: 8-12
- Sets: 3
- Pro tip: Keep your core braced tight. Don’t let your lower back sag.
3. Triceps dips (using a chair or step)
Primary target: Triceps
Grab a sturdy chair, couch edge, or step (technically still no “equipment”). Place your hands on the edge behind you, extend your legs out, and lower your body by bending your elbows to roughly 90 degrees. Press back up by straightening your arms completely.
This one delivers a serious triceps pump. The main mistake people make? Letting their shoulders shrug up toward their ears. Keep your shoulders pulled DOWN and back throughout the entire movement. Your elbows should point straight behind you, not flaring out to the sides.
- Reps: 10-15
- Sets: 3-4
- Pro tip: Bend your knees to make it easier, or elevate your feet to make it brutal.
4. Chin-up hold (isometric biceps blast)
Primary target: Biceps
Okay, I hear you: “But I don’t have a pull-up bar!” You can use a sturdy door frame, a tree branch, a staircase railing, or even two chairs with a broomstick across them. Get creative. The point is to hang with your chin above your hands, palms facing you, and HOLD.
Isometric holds are brutally effective for biceps development. Aim for a 20-30 second hold with your arms at a 90-degree bend. Your biceps will be screaming by second fifteen. This is one of the few body weight exercises that directly isolates the biceps, and it’s absolutely worth the improvisation it takes to find a hanging surface.
- Hold: 20-30 seconds
- Sets: 3-4
- Pro tip: If you can’t hold yet, jump up to the top position and lower yourself as slowly as possible (negative reps).
5. Pseudo planche push-ups
Primary target: Biceps, anterior shoulders, chest
This is the exercise that changed my perspective on body weight biceps training entirely. Set up like a regular push-up, but rotate your hands so your fingers point toward your feet (or at least sideways). Lean your torso forward past your hands, then perform push-ups from this position.
The forward lean creates an insane amount of tension through your biceps and front deltoids. It looks subtle but feels absolutely nothing like a regular push-up. FYI, this one requires decent wrist flexibility, so warm up your wrists thoroughly before attempting it.
- Reps: 6-10
- Sets: 3
- Pro tip: Start with a mild forward lean and increase it gradually over weeks.
6. Plank to push-up (commandos)
Primary target: Triceps, shoulders, core
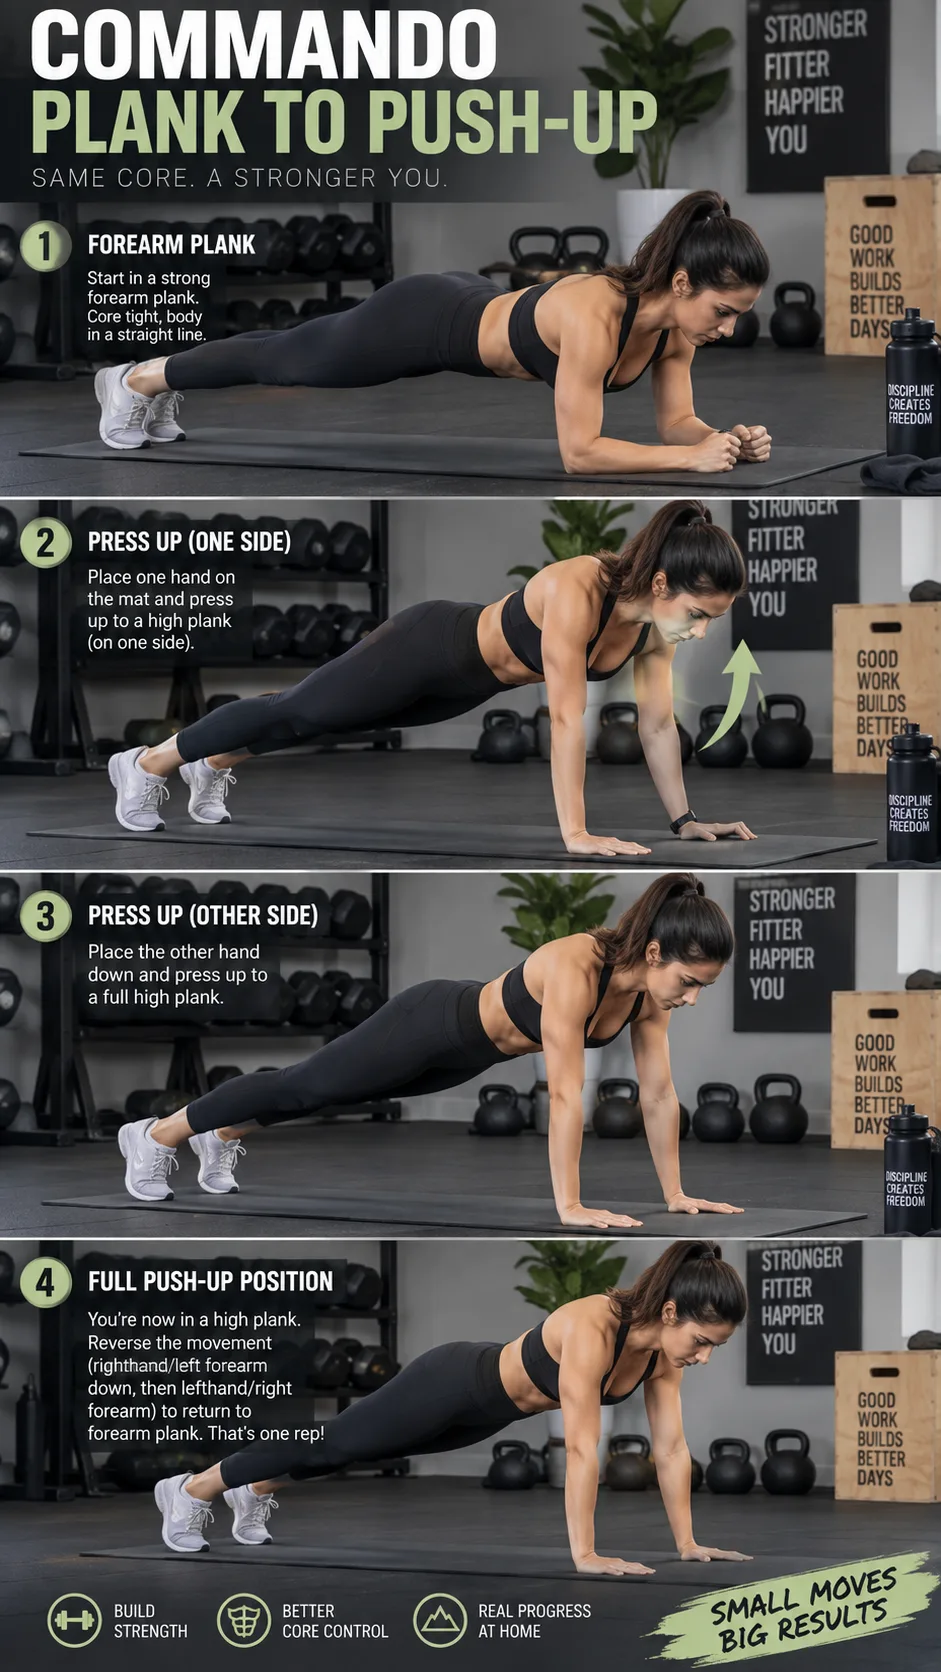
Start in a forearm plank. Press up onto one hand, then the other, until you’re in a full push-up position. Lower back down one arm at a time. Alternate which arm leads each rep. Simple concept, right? Now try doing 20 of them without wanting to quit life.
This exercise hammers your triceps while also demanding serious core stability. It’s a two-for-one deal that builds functional arm strength you’ll use in real life (getting off the floor, pushing yourself up from awkward positions, and generally being a capable human).
- Reps: 12-20 (alternating lead arm)
- Sets: 3
- Pro tip: Keep your hips as still as possible. No rocking side to side.
7. Inverted rows (using a table)
Primary target: Biceps, rear deltoids, upper back
Lie underneath a sturdy table, grab the edge with an underhand grip (palms facing you), and pull your chest up to the table’s edge. This is essentially a body weight curl combined with a row, and it’s one of the best no-equipment biceps exercises that exists.
The underhand grip preferentially recruits your biceps compared to an overhand version. Make sure the table can support your weight. Test it first unless you enjoy explaining to your landlord why the dining table collapsed. IMO, this exercise is criminally underrated in the body weight training world.
- Reps: 8-12
- Sets: 3-4
- Pro tip: The more horizontal your body, the harder it gets. Bend your knees to reduce difficulty.
8. Hand-release push-ups
Primary target: Triceps, chest, shoulders
Perform a push-up, but at the bottom, lower yourself completely to the floor. Briefly lift your hands off the ground, then place them back down and push up explosively. This eliminates any momentum or “bounce” from the bottom position, forcing your arms to do ALL the work from a dead stop.
Ever wondered why some people do hundreds of push-ups but still have underwhelming arms? It’s usually because they’re bouncing through their reps and barely activating anything. Hand-release push-ups fix that problem completely. Each rep starts from zero tension, demanding full muscular engagement.
- Reps: 8-12
- Sets: 3
- Pro tip: Squeeze your glutes at the top of each rep for a stronger, more stable lockout.
9. Crab walk
Primary target: Triceps, shoulders, forearms
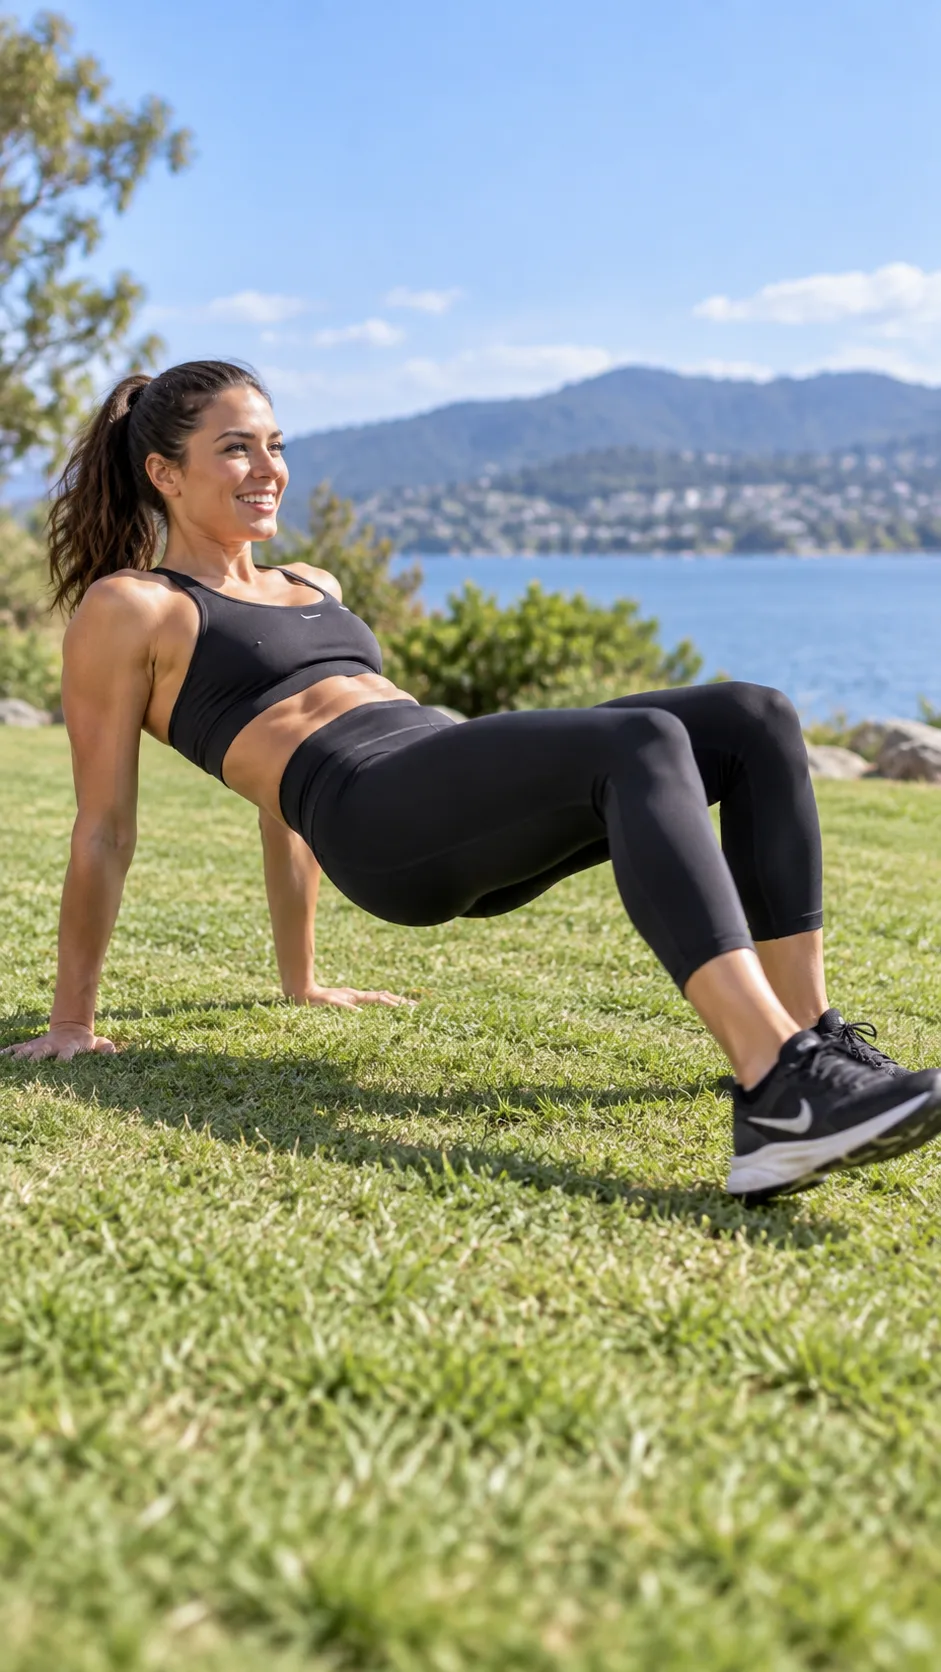
Sit on the floor with your hands behind you, fingers pointing forward. Lift your hips off the ground so you’re in a “tabletop” position facing upward. Now walk forward, backward, and laterally in this position. It looks ridiculous. It works phenomenally.
The crab walk keeps your triceps and shoulders under constant tension while also building wrist and forearm strength. It’s a sneaky total-arm burner that most people overlook because, well, it looks silly. But looking silly while getting strong is a trade-off I’ll take every single time.
- Distance: 20-30 feet in each direction
- Sets: 3
- Pro tip: Keep your hips high. Don’t let your butt drag on the ground.
How to structure your body weight arm workout
Having nine exercises is great, but throwing them together randomly won’t give you optimal results. Here’s a simple, structured workout format you can follow 2-3 times per week:
- Warm-up: 5 minutes of arm circles, wrist rotations, and light push-ups (5-10 reps)
- Diamond push-ups: 3 sets × 10-15 reps
- Pike push-ups: 3 sets × 8-12 reps
- Inverted rows (underhand): 3 sets × 8-12 reps
- Triceps dips: 3 sets × 12-15 reps
- Pseudo planche push-ups: 3 sets × 6-10 reps
- Plank to push-up: 3 sets × 12-16 reps
- Chin-up hold: 3 sets × 20-30 seconds
- Hand-release push-ups: 3 sets × 8-12 reps
- Crab walk: 3 sets × 30 seconds each direction
Rest 45-60 seconds between sets. The entire workout should take roughly 35-45 minutes. If you’re short on time, pick 5-6 exercises and superset them (perform two exercises back-to-back with no rest). Your arms will still get wrecked in 20 minutes flat.
Progressive overload without weights
Here’s where most people go wrong with body weight training. They do the same reps, same sets, same difficulty week after week and then wonder why their arms stopped growing. Progressive overload applies to body weight training just as much as it does to weight lifting.
You need to make things harder over time. Here’s how:
- Slow down your reps: Use a 3-second lowering phase and 1-second press. This dramatically increases time under tension.
- Add pauses: Hold the bottom of each push-up for 2-3 seconds.
- Increase volume: Add 1-2 reps per set each week until you hit your target range, then move to a harder variation.
- Elevate your feet: For push-up variations, putting your feet on a chair or step increases the load on your arms.
- Reduce leverage: Lean further forward in pseudo planche push-ups, or extend your legs fully during dips.
If you’re also interested in incorporating some light weights as you progress, check out this guide on dumbbell arm workouts that pairs beautifully with body weight training. And for a complete no-equipment routine focused specifically on toning, this arm workout with no equipment has some excellent complementary exercises.
Common mistakes that kill your progress
I’ve watched friends (and made these mistakes myself) sabotage their body weight arm workouts in predictable ways. Here are the big ones to avoid:
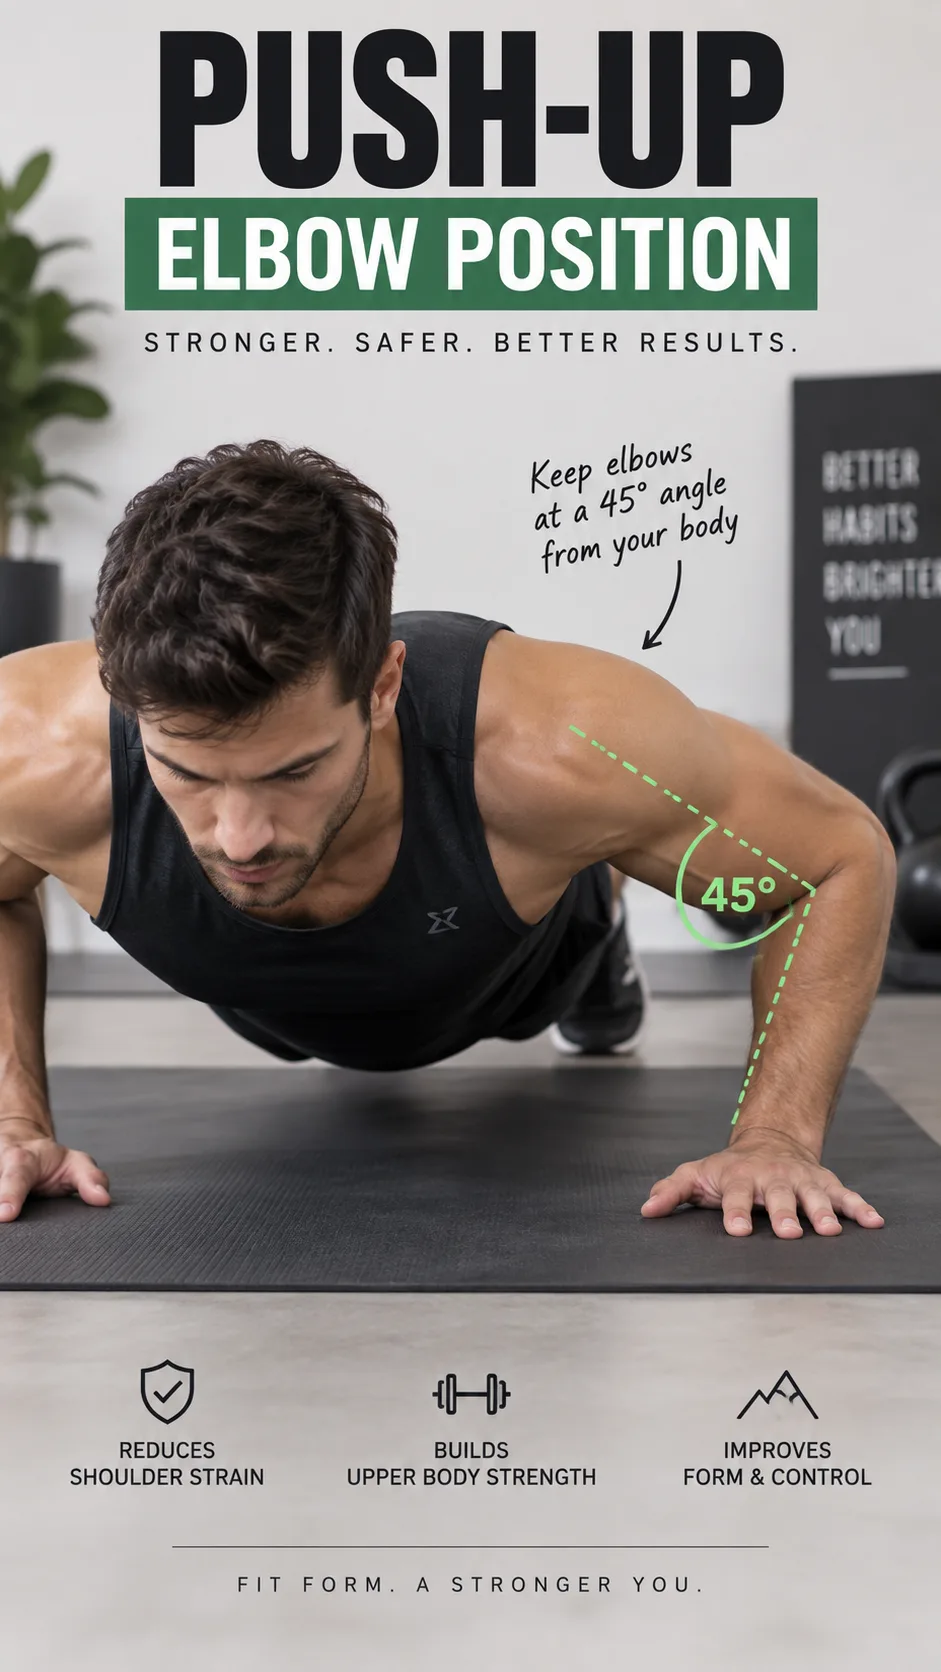
Flaring your elbows on push-ups. Your elbows should track at roughly a 45-degree angle from your body, not straight out to the sides at 90 degrees. Flaring puts your shoulders in a compromised position and reduces triceps activation. The National Academy of Sports Medicine consistently talks about proper elbow tracking for injury prevention.
Going too fast. Speed is the enemy of body weight arm training. Every rep you rush through is a rep where momentum does the work instead of your muscles. Slow it down. Control every inch of every repetition.
Skipping the eccentric (lowering) phase. The lowering portion of any exercise creates more muscle damage (the good kind that leads to growth) than the lifting portion. If you’re dropping like a stone during push-ups and dips, you’re leaving half your gains on the table.
Neglecting rest days. Your muscles grow during recovery, not during the workout itself. Training arms every single day doesn’t make them grow faster. It makes them tired, inflamed, and weaker. Stick to 2-3 sessions per week with at least one rest day between sessions.
Nutrition: the other half of the equation
You can do the world’s best body weight arm workout and still see zero results if your nutrition is garbage. Muscle needs protein to repair and grow. Period. Aim for 0.7-1 gram of protein per pound of body weight daily. That’s the range supported by most sports nutrition research.
You also need adequate calories. Training in a severe calorie deficit while trying to build arm muscle is like trying to build a house while someone keeps stealing your bricks. Eat enough to support your training, prioritize protein, and stay hydrated. It’s not complicated, but it IS essential.
If you want more arm-focused training options that incorporate weights for variety, this arm workout with weights guide offers a great framework you can alternate with your body weight sessions.
How long before you see results?
Real talk: you won’t see dramatic changes after one week. But with consistent training (2-3 times per week), proper progressive overload, and adequate nutrition, most people notice visible arm definition within 4-6 weeks. Meaningful strength gains typically show up even sooner, often within the first 2-3 weeks.
The initial strength gains come primarily from neural adaptations. Your brain gets better at recruiting muscle fibers. Actual muscle growth (hypertrophy) follows shortly after. So if your arms feel stronger before they look bigger, that’s completely normal and a sign everything is working as it should.
Consistency beats intensity every time. Showing up three times a week and doing decent workouts will always outperform one weekly “destroy your arms” session that leaves you unable to lift a coffee cup for four days.
Final thoughts
Building stronger arms at home with zero equipment isn’t just possible. It’s practical, effective, and honestly kind of liberating. You don’t need a gym membership, fancy machines, or even a set of dumbbells. Your body weight, gravity, and a willingness to push yourself are genuinely all you need.
These nine exercises (from diamond push-ups to crab walks) target every muscle in your arms from multiple angles. Pair them with progressive overload principles, adequate protein, and consistent effort, and your arms WILL respond. I’ve seen it work for myself and dozens of others.
So pick your workout day, clear a small space on your floor, and get after it. Your arms have been waiting for this. And the best part? The gym is always open when it’s your living room.