
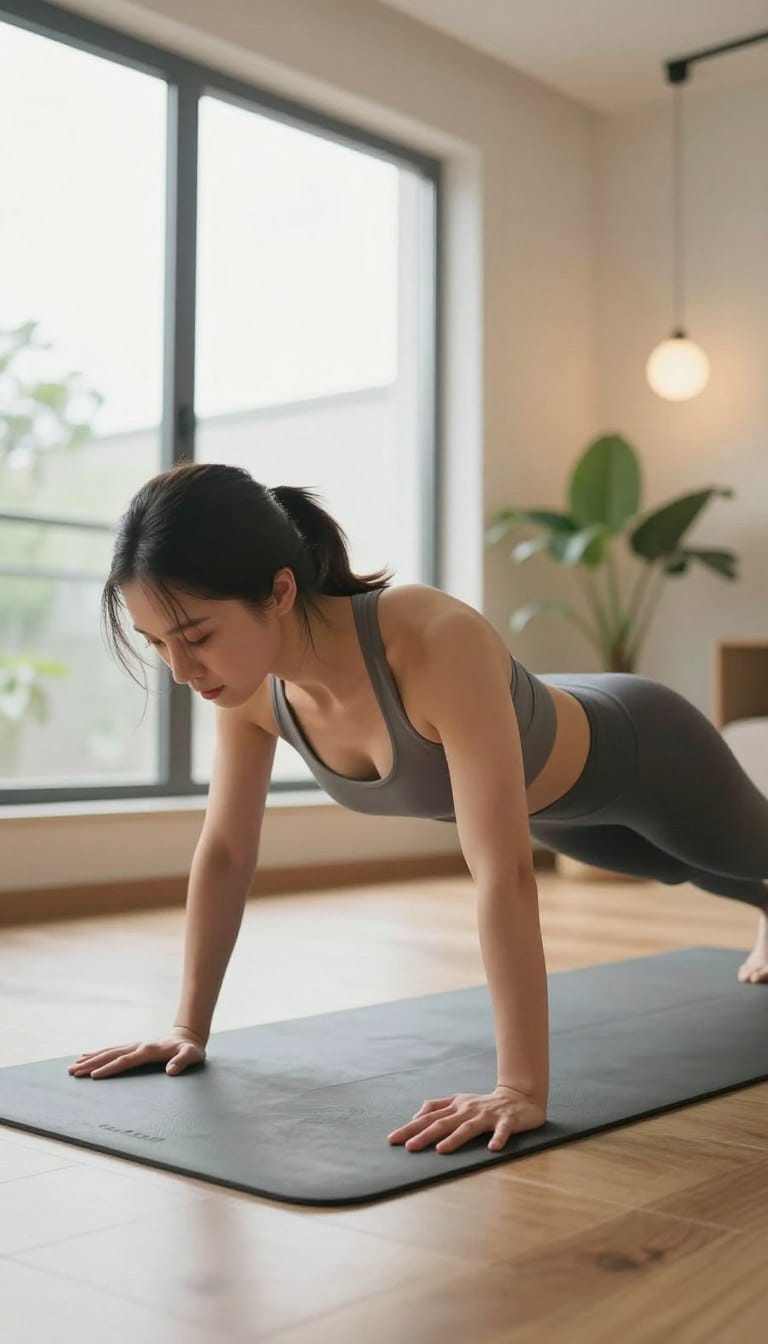
Can simple moves on the floor truly build visible strength and definition?
You don’t need a gym or heavy weight to challenge your upper body. Fitness coach Corrine Carnation, CPT, says holding a plank can feel like time stops — and that’s the point. Planks and other bodyweight drills target shoulders, triceps, chest, and core all at once.
Experts like Tatiana Lampa, CPT, add that these routines support bone health and functional strength. You can train from your living room, office, or a hotel room. A towel for sweat is often the only extra item you might use.
These exercises are designed for any fitness level. Start with basic positions, focus on form, and build steady progress. With consistency, you’ll notice firmer arms, stronger shoulders, and better posture — all without pricey gear.
Key Takeaways
- Bodyweight moves like planks are powerful and accessible for building strength.
- Your body provides enough resistance to develop the shoulders, triceps, and chest.
- These routines can improve bone health and daily function, per certified trainers.
- Minimal space and a towel are enough to get started at home.
- Focus on position and consistency to see real definition and strength gains.
Understanding the Benefits of Bodyweight Training
Using your own body as resistance lets you build strength and control from day one.
Allison Kalsched, CPT, says you are your own gym. When you focus on clean position and steady effort, your bodyweight provides enough load to challenge the shoulders, triceps, chest, and core.
Bodyweight exercises let you learn movement patterns without bulky gear. That makes starting safer and more approachable for most people. You can experiment with plank variations, side holds, and controlled pushes on the floor to target specific muscles and the back.
There is less risk of injury than dropping heavy weight or snapping bands. Advanced trainees also benefit: they can play with tempo and range to develop new skills without cluttering their space.
- You gain strength with progressive effort and smart intensity.
- Hands, feet, elbows, and hips all help create full-body tension.
- Bodyweight training suits both starting and advanced fitness levels.
| Benefit | How it Helps | Easy Example | Who It’s For |
|---|---|---|---|
| Safer Progress | Less risk than heavy weight or broken bands | Modified push on knees | Beginners |
| Skill Development | Builds control and balance | Side plank holds | Advanced and curious trainees |
| Full-Body Load | Uses hands, feet, hips, and core together | Plank to push variations | All fitness levels |
Anatomy of Your Arm Muscles
Understanding which muscles do the work makes it easier to target strength and tone with bodyweight drills.
Knowing the movers helps you set the right position and feel each rep. The front and back of your upper limb each play a distinct role when you press, pull, or hold on the floor.
Biceps and Triceps
The triceps brachii has three heads that start near the shoulder and span the backside of the upper arm. They straighten the elbow and are key when you press from your hands or perform dips.
The biceps brachii flexes the elbow and helps you rotate the hand and forearm in daily tasks like lifting a glass. Both muscles work with the elbow and forearm to create visible tone and practical strength.
Shoulders and Back
Your deltoids sit over the shoulder joint and attach to the humerus so you can move the arm in all directions. The latissimus dorsi, or lats, are large back muscles that stabilize the spine and assist pulling motions.
Understanding these groups—plus the chest and upper back—helps you choose exercises that balance the front and back of your body for better posture and lasting strength.
- The triceps straighten the elbow during presses and holds.
- The biceps lift and rotate the hand and forearm.
- Deltoids and lats support shoulder range and upper back stability.
Essential Strategies for an Effective Arm Workout Women No Equipment
Simple adjustments to reps and tempo make bodyweight sessions far more effective than you might expect.
Focus on time under tension. Trainer Tatiana Lampa, CPT, recommends slowing the lowering phase to three to five seconds. This keeps the muscles working longer and improves control.
Try adding two to six reps per set compared with what you would do with dumbbells. That extra volume helps build visible definition when you perform compound moves.
Pick multi-joint exercises that use your hands, feet, hips, and core together. Moves like plank-to-press or close-hand push variations engage triceps, chest, shoulders, and back at once.
- Increase reps gradually and track progress.
- Control tempo—lower slowly, press with purpose.
- Reduce rest or add reps to progress intensity.
| Focus | Tip | Example |
|---|---|---|
| Tempo | 3–5 sec lowering | Slow push press |
| Volume | +2–6 reps vs. weight | Extra reps per set |
| Compound | Use full-body tension | Plank variations |
Preparing Your Body for Movement
Good preparation sets the stage for safer, more effective sessions.
Warmup Techniques
Start by engaging your core and checking your rib-cage position. Allison Kalsched, CPT, stresses you must control the core and rib cage before beginning upper-body moves.
Before you flex those arm muscles, stabilize your abdomen and pelvis. This keeps your spine neutral and helps transfer strength from your hips through your hands and feet.
- Begin with diaphragmatic breathing to settle the rib position and engage core.
- Do shoulder circles and slow plank walks to warm the shoulders and back.
- Add light floor presses and elbow-to-knee side holds to wake triceps, chest, and side muscle chains.
- Finish with gentle hip hinges so your hips and pelvis feel steady when you press or hold.
| Warmup | Purpose | Example |
|---|---|---|
| Breathing drill | Set rib position | 5 slow belly breaths |
| Shoulder mobility | Prime shoulders and back | Arm circles, 30 sec |
| Core activation | Neutral spine, transfer strength | Modified plank, 20–40 sec |
Mastering the Classic Pushup
A clean pushup teaches you how to create full-body tension while targeting pressing muscles.
Proper Form
Start in a solid starting position. Get into a plank position with your hands placed slightly wider than your chest and your feet hip-width apart.
Brace your core and keep your hips level. As you lower your body toward the floor, bend elbows and maintain a straight line from head to heels.
Lower until your chest nears the floor, then push through the floor to return to the starting position. Keep your glutes squeezed and avoid letting your back arch or cave.
Modifying for Beginners
Make it easier when you need to. Use knee pushups, wall pushups, or an incline on a bench or table to reduce the weight you press.
Focus on the same cues: place hands under the shoulders, keep the core engaged, and bend elbows with control. Progress by reducing the incline or moving from knees to full plank.
- Tatiana Lampa, CPT, highlights pushups for building shoulder girdle strength and stability.
- Maintain control on the way down; quality beats quick reps.
- Consistent practice builds strength without extra gear.
| Element | What to Check | Beginner Option |
|---|---|---|
| Hands | Place hands slightly wider than chest, under shoulders | Wall or incline push |
| Core | Brace to keep hips level and protect back | Knee pushups with core focus |
| Elbows | Lower by bending elbows, track close to the body | Shorter range on incline |
Engaging Your Back with Superman Variations
The prone Superman is a simple move that lights up the upper back and posterior shoulder chain.
This exercise targets the triceps, lats, and shoulders while using your own bodyweight as resistance. Your arms make up about 10–12% of your total weight, so lifting them and your legs gives meaningful load to the posterior chain.
Lie face down with your arms overhead and your legs long. Keep your head relaxed and your spine neutral.
- Contract your core to protect your lower back.
- Simultaneously lift hands and feet a few inches off the floor.
- Hold the top position for 3–5 seconds to maximize triceps and shoulder activation.
- Lower with control, focusing on the squeeze across your upper back and between the shoulder blades.

| Focus | Cue | Reps |
|---|---|---|
| Posture | Neutral spine, relaxed neck | 8–12 |
| Hold | Top squeeze, 3–5 sec | 3–4 sets |
| Progression | Add small pulses or single-leg raises | Increase slowly |
Sculpting Triceps with Dips
Chair dips are a focused, low-cost move to strengthen the back of your upper limb.
You’ll start seated at the front edge of a sturdy chair. Place hands on the front corners with your palms facing down. Scoot forward so your butt clears the seat and keep a 3 to 6 inch gap between your back and the chair.
Chair Safety
Check the chair is stable and on a non-slip surface before you begin. Plant your feet firmly so you feel steady.
From the starting position, slowly bend elbows to lower your body until your elbows reach about 90 degrees. Keep your shoulders down and avoid shrugging toward your ears.
- Focus on the triceps as you press back up—extend arms fully at the top.
- If hips and core feel weak, bend your knees slightly to reduce load.
- Stop if you feel pain in the shoulder or wrist and re-check position.
| Focus | Why it matters | How to cue |
|---|---|---|
| Grip | Stability and control | Place hands on front edges, palms facing down |
| Range | Targets triceps muscle | Lower body until elbows ~90° then press up |
| Safety | Prevents falls and strain | Use stable chair, feet planted, 3–6 in gap |
Building Stability with Plank Variations
Move one hand and your whole body must adjust.
Start in a high plank position with your hands under your shoulders and feet slightly wider than hip-width. This starting position gives a solid base so you can test balance safely.
For a plank tap, bring your left hand to your right shoulder and tap it, then return the hand to the floor. Keep your hips steady and spine neutral. The goal is to avoid rocking your hips or twisting your torso.
Plank up-downs require you to lower your right forearm to the floor, then your left, before pressing back up into the high plank. Bend elbows gently and move with control.
These movements force each arm to work separately. That isolation increases resistance without adding weight and improves shoulder and triceps stability for better daily strength.
- Keep core tight and hips level during each rep.
- Start with slow reps and focus on form over speed.
- Use knees on the floor if your shoulders or elbows need relief.
| Variation | Key Cue | Reps |
|---|---|---|
| Plank Tap | Left hand to right shoulder; hips still | 8–12 per side |
| Plank Up-Down | Lower to forearms, press back up; bend elbows controlled | 6–10 rounds |
| Wide-Foot Plank | Feet wider for stability; keep spine neutral | Hold 30–60 sec |
Dynamic Movements for Shoulder Strength
Small, controlled reaches and rotations build durable strength across the shoulder and upper back.
Begin in a clear starting position. Get into a side plank position with your forearm under your shoulder and your feet stacked or staggered for balance. Keep the core tight and hips lifted.
From the plank position, extend your right hand toward the ceiling. Rotate forward and thread that hand under your torso, reaching between your body and the floor to complete the side plank thread the needle. Return slowly and repeat with the left hand.
Arm lateral raises complement the thread the needle. Stand or sit tall, keep your arms straight, and lift to shoulder height with palms facing inward. Hold briefly to isometrically engage the biceps and triceps before lowering with control.

- Side plank thread the needle targets obliques, upper back, and shoulder stability.
- Arm lateral raises hit the top of the shoulder and support balanced muscle development.
- Use bodyweight resistance and steady tempo to build lasting strength.
| Exercise | Primary Focus | Key Cue |
|---|---|---|
| Thread the Needle | Upper back & shoulders | Rotate, thread hand under torso |
| Lateral Raise | Deltoid top | Keep palms facing inward, lift to shoulder |
| Side Plank Hold | Core & shoulder stability | Elbow under shoulder, hips lifted |
Incorporating Crawling Patterns
Crawls blend mobility and strength in a single, portable movement you can do on any floor.
Start in a tabletop starting position with your hands under your shoulders and hips over your knees. Shift your weight into your hands and hover your knees slightly off the floor so your spine stays neutral.
Move your left hand and right knee forward together while keeping the hips parallel to the floor. Reverse the pattern—hand right, knee left—to travel without twisting.
Tatiana Lampa suggests imagining a glass of water balanced on your back to keep hips steady. Widen your stance if you need more stability.
- Great for shoulders, chest, triceps, and core at once.
- Keep elbows soft and shoulders stacked to protect joints.
- Control the pace to add strength without extra weight.
| Cue | Purpose | Progression |
|---|---|---|
| Hands under shoulders | Stable base for movement | Slow controlled steps, 20–40 ft |
| Hover knees | Load through shoulders and core | Increase distance or time |
| Hips parallel | Protect low back and keep spine neutral | Use narrower stance to increase challenge |
| Left hand right knee pattern | Coordination and balanced strength | Add backward crawl for variety |
Utilizing Isometric Holds for Endurance
Isometric holds are powerful for building endurance and control in your arms and core. These static exercises demand steady tension, so your muscles work longer without added weight.
Start from a clear starting position. Come onto all fours with your knees under your hips and your hands under your shoulders. Keep your spine neutral and your feet relaxed.
Try triceps circles to mash endurance and precision. Bend elbows to lower your forearms and chest until they almost touch the mat. Skim the floor with your torso and make tiny, controlled circles close to the surface.
Push into the mat with your hands to extend arms and return to the starting position to finish one rep. Alternate sides and use a steady tempo so each rep maximizes time under tension.
- Triceps circles keep constant tension for sculpted definition.
- Isometric holds like the plank build core and shoulder endurance without extra weight.
- Short sets with focused breath improve strength and form for longer sessions.
Use these exercises in your routine to increase muscular endurance and practical strength for daily tasks and longer training sessions.
Creating a Consistent Weekly Routine
A clear schedule helps you balance effort, recovery, and gradual gains across the week.
Aim to train your arms two to three times weekly. Use a mix of bodyweight and light free weight moves. Tatiana Lampa suggests AMRAP or EMOM formats to make short sessions more efficient.
Sample Weekly Schedule
Keep sessions focused and simple. Below is a sample plan you can adapt to your time and fitness level.
- Day 1: Upper day — back and biceps emphasis; include plank holds and rows.
- Day 3: Full-body with triceps and chest drills; floor presses and dips.
- Day 5: Short AMRAP of mixed bodyweight arm and core moves for endurance.
Balancing Intensity
Start with basics like three sets of ten before increasing reps or time under tension. After six to 12 weeks, change exercises, order, or tempo to keep muscle growth going.

| Week Focus | Format | Example |
|---|---|---|
| Build Base | 3x per week | 3 sets of 10, controlled tempo |
| Time Efficiency | AMRAP/EMOM | 10-min EMOM: plank, dips, fast crawl |
| Progression | Switch every 6–12 weeks | New exercises or added reps |
Progressive Overload Without Weights
Adding reps or holding positions longer makes bodyweight moves harder and more effective.
Start by increasing volume. Aim to raise repetitions gradually, working toward about 20 per set for many exercises. This extra work forces your muscles to adapt while you train with only your body.
Always engage core muscles to protect your spine and keep the correct position. Tight core and steady hips help your hands, feet, and elbows share load evenly as you push and hold.
Use tempo, holds, and ranges of motion to add challenge. Slow the descent on a push or hold a plank longer to tax the triceps, chest, shoulder, and back without added weight.
- Increase reps or time under tension before changing exercises.
- Mix in side holds and single-hand progressions for unilateral strength.
- Be consistent; bodyweight training builds size and strength early on.
| Method | How to Apply | When to Move On |
|---|---|---|
| Volume | Raise reps to ~20 | Sets feel easy for 3 sessions |
| Tempo | Slow 3–5 sec lowers | Control improves but no fatigue |
| External Resistance | Add band or weight | Bodyweight no longer challenges strength |
Nutrition and Recovery for Muscle Tone
Nutrition and sleep shape how your muscles adapt after every session on the floor.
Strengthening your arm muscles supports daily tasks like lifting and pulling. You’ll see early gains from bodyweight drills, but those gains depend on how you fuel and rest.
Eat enough protein across the day to repair tissue. Include whole foods, healthy fats, and carbs for energy. Hydrate—water helps joints, hands, and connective tissue recover.
Sleep matters as much as food. Aim for 7–9 hours so growth and repair hormones do their work. Short naps can help if your nights are split.
Remember: body weight is a powerful starting tool. Over time, to build larger visible muscle you will need to add external weight or varied resistance. Recovery lets you train more often and avoid overuse of shoulders, triceps, and elbows.
- Prioritize protein, hydration, and quality sleep.
- Use progressive steps when adding weight later.
- Track rest days to reduce fatigue and injury risk.
| Focus | Why It Helps | Practical Tip |
|---|---|---|
| Protein | Repairs muscle fibers after exercises | 20–30 g per meal, variety of sources |
| Sleep | Supports hormone-driven repair | Consistent 7–9 hours, dark room |
| Progression | Needed for larger muscle gains | Add resistance or heavier sets after 8–12 weeks |
Common Mistakes to Avoid
Tiny position errors multiply over sets and slow your strength gains.
Failing to engage core is one of the most common faults. When your core is loose, the hips sag and the spine rounds. That limits how well your arm muscles and chest can work during presses and planks.
Neglecting the upper back creates imbalances. If you only press, the shoulders and back lose coordination. That can make your triceps, deltoids, and back weaker over time.
- Don’t forget to target all major arm muscles: biceps, triceps, and deltoids.
- Avoid arching your back during a plank; keep hips neutral and ribs down.
- Actively contract the working muscles each rep—squeeze the triceps and chest on the press.
- Check hand and foot placement so elbows track safely and shoulders stay stacked.
| Mistake | Why It Matters | Quick Fix |
|---|---|---|
| Not engaging core | Loss of tension, poor spine alignment | Brace belly, tuck ribs, keep hips steady |
| Ignoring upper back | Postural imbalance and weaker pulls | Add rows, supermans, and rear delt work |
| Poor plank position | Shoulder strain and limited triceps activation | Shorten range, check hand spacing, lift through chest |
| Rushing reps | Less muscle recruitment and form breaks | Slow the lowering phase; pause briefly at top |
Conclusion
Wrap up your plan with a simple promise: be consistent and prioritize quality of movement.
You now have a clear guide to a bodyweight-based routine and how to progress. Use short sessions, steady reps, and the cues from this article to protect your joints and build strength.
Focus on proper position every set and add reps gradually. Over time, your arms will grow stronger and your arm endurance will improve.
Listen to your body and give muscles time to rest. Start today and weave these moves into your weekly routine to reach your goals.