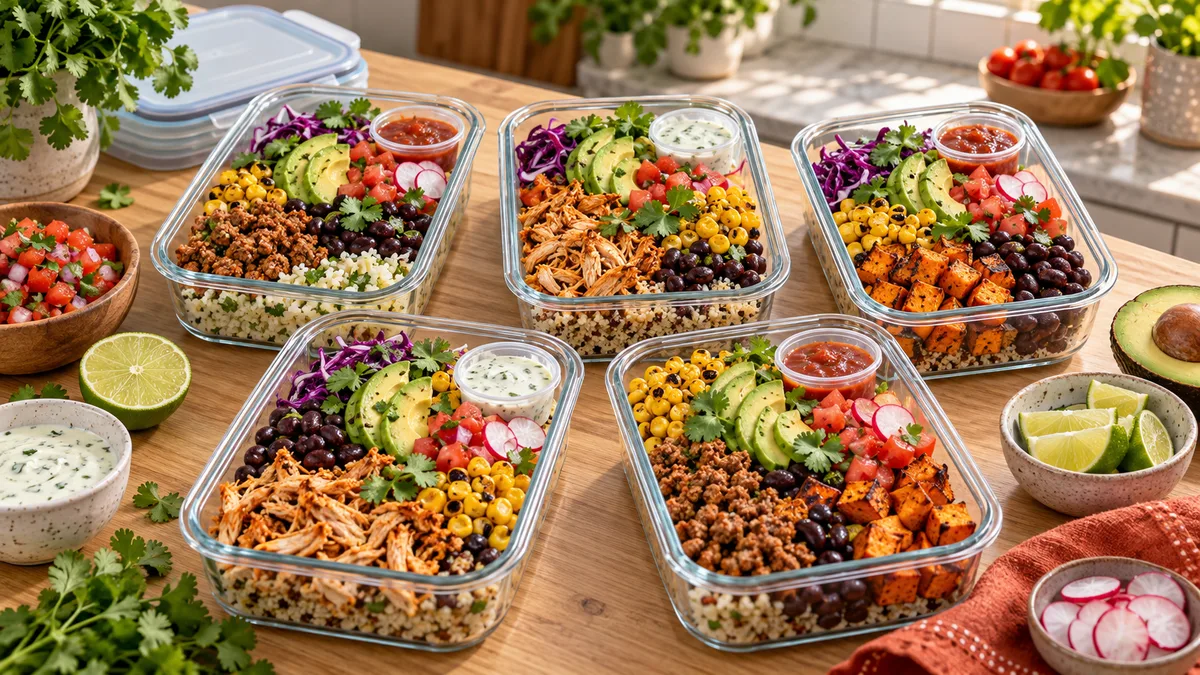
Nobody enjoys spending fifteen dollars on a lukewarm takeout bowl during a thirty-minute lunch break. You wait in line, pay hard-earned money, and sit down to limp lettuce smothered in salty dressing. You deserve a better midday meal.
A well-built taco bowl solves this problem completely. When you layer ingredients the right way, taco bowls give you bold spices, crisp textures, and clean nutrition that carries you through the afternoon. They taste just as fresh on Thursday as they do on Sunday afternoon.
Most cooks struggle with meal prep because they layer their containers incorrectly. They pile warm rice straight under wet tomatoes, watch their food turn to gray mush by Tuesday, and give up on batch cooking. Proper technique fixes this immediately. You only need a smart layering method, five dependable recipes, and simple storage habits that keep your vegetables crisp and your meat tender all week long.
The Science of Non-Soggy Prep: The Golden Layering Rules
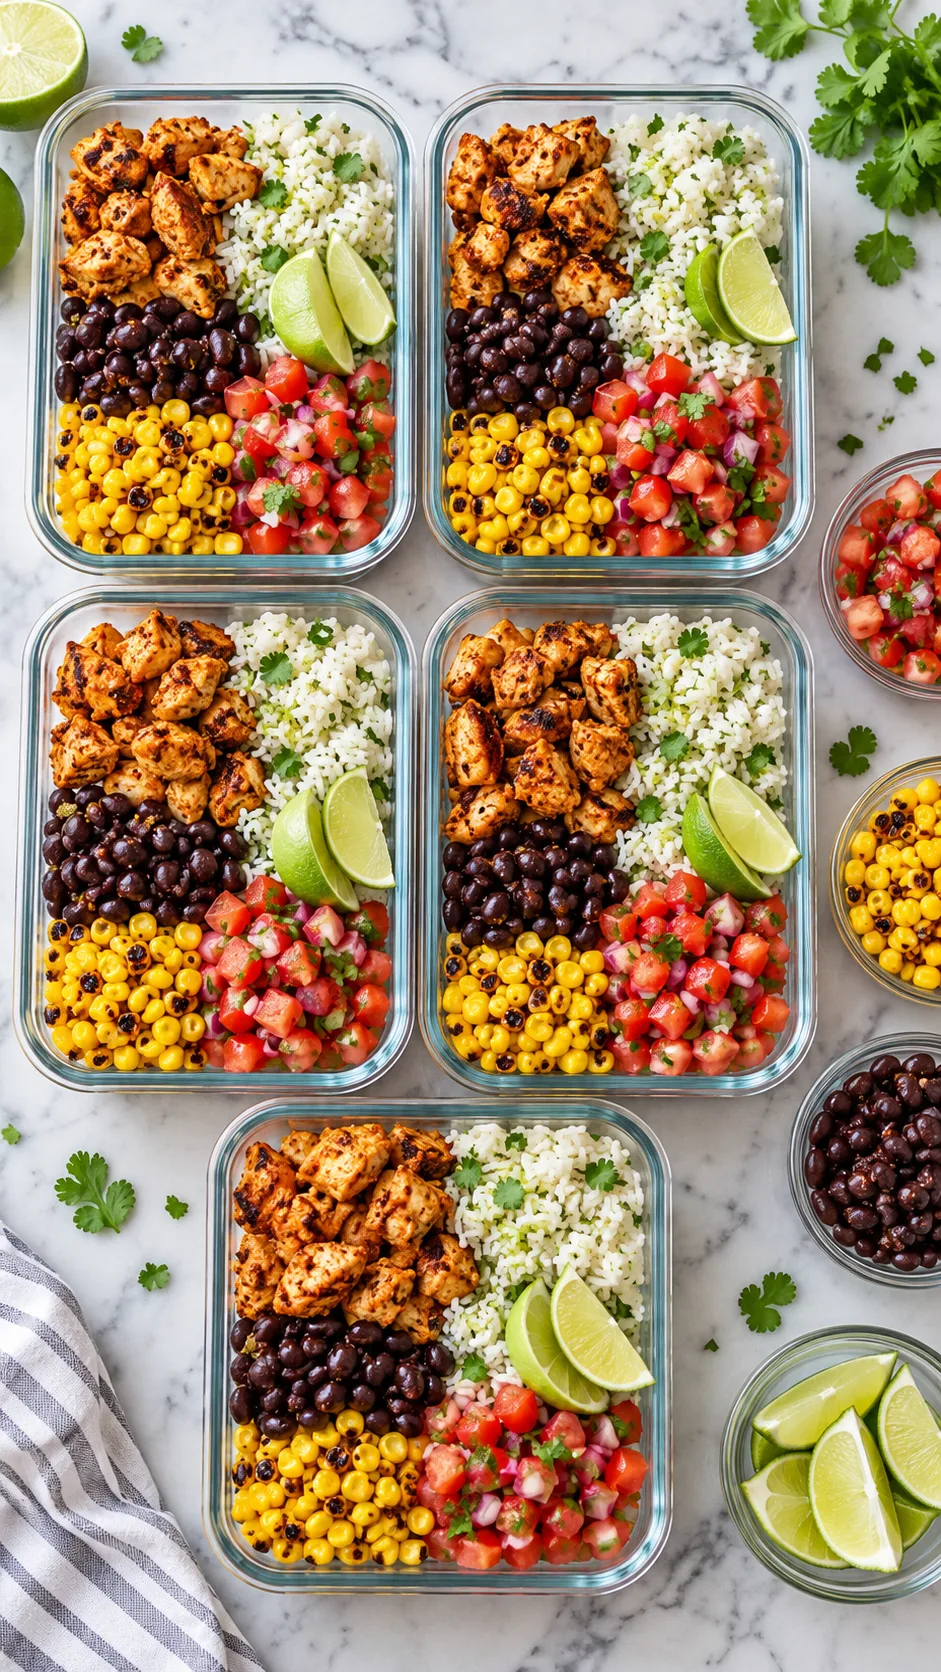
Prepped taco bowls break down after two days for one specific reason: moisture migration. Water seeps from wet ingredients straight into crisp ones, making fresh greens limp and turning firm rice into paste. Think of your meal container as a small engineering project where correct order prevents soggy food.
Follow these rules every time you pack a container:
- Cool Everything Completely: Never seal warm food inside an airtight container. Trapped steam creates condensation on the lid, drips back onto your ingredients, and speeds up spoilage. Let your grains and meats reach room temperature before you close the lid.
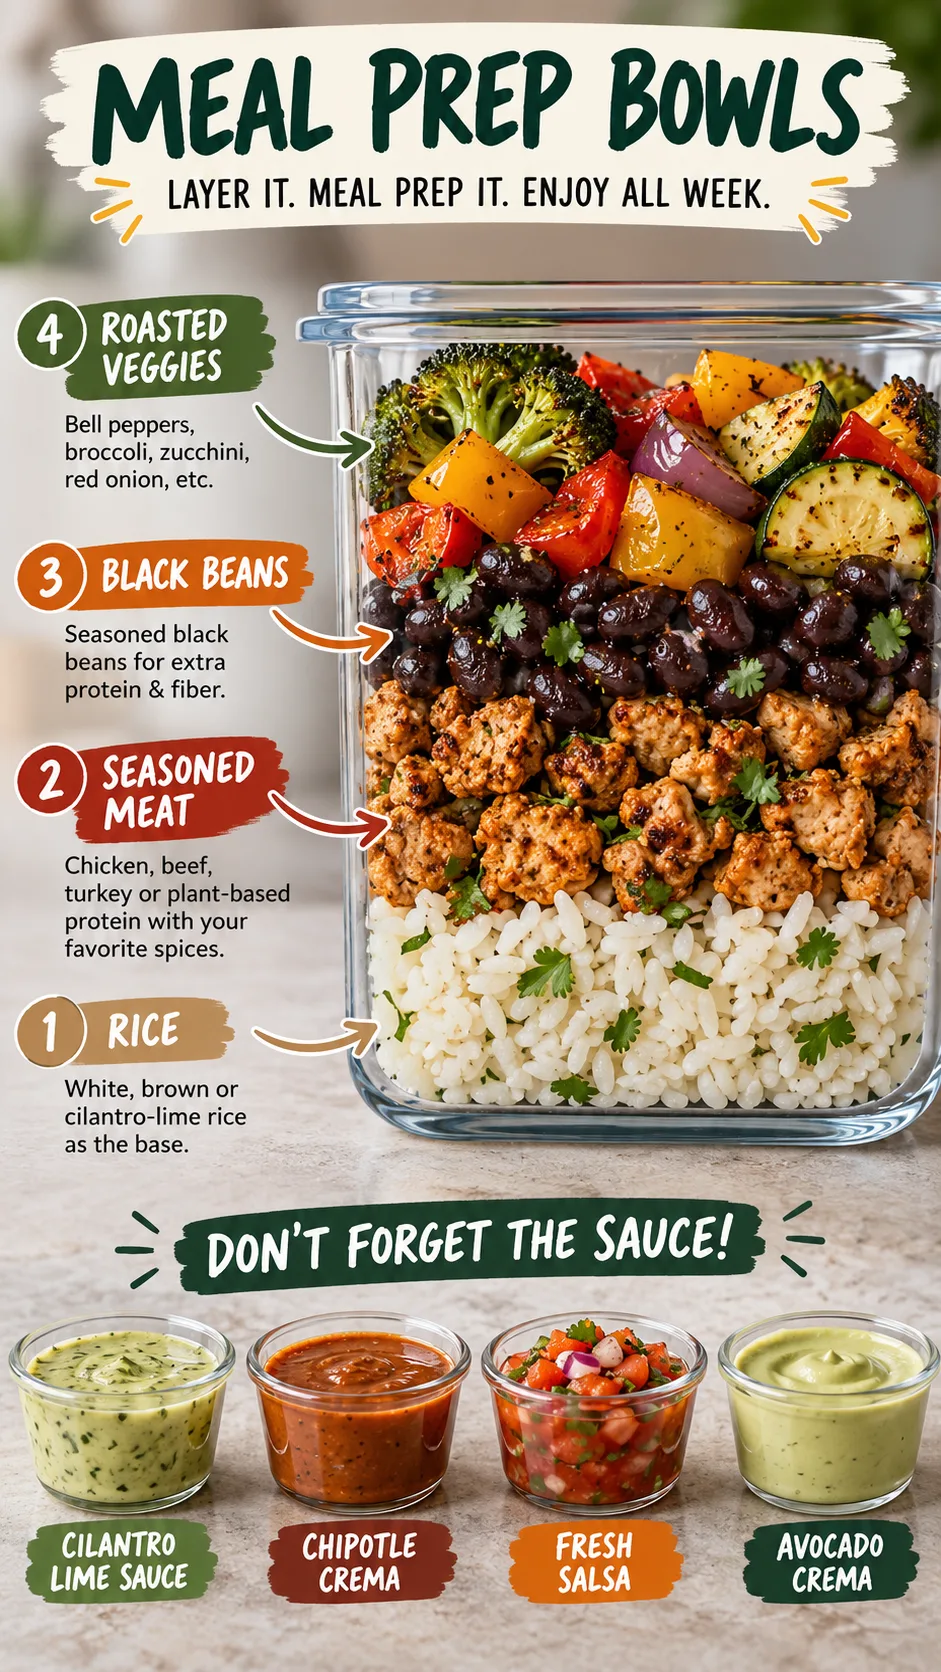
- The Bottom Base: Put your grains or fiber at the bottom. Brown rice, cilantro-lime white rice, or quinoa acts like a sponge, catching flavorful pan juices from the meat above.
- The Center Anchor: Spoon your protein and hearty beans (like black beans or pinto beans) directly over the grain layer. This placement allows savory juices to soak downward into the base.
- The Barrier Line: Roast dense vegetables like bell peppers, onions, and sweet potatoes, then layer them over your protein. Roasted vegetables handle residual moisture without turning soggy.
- The Cold Quarantine: Keep wet, raw ingredients separated until lunch time. Store fresh salsa, shredded lettuce, sour cream, and guacamole in small side cups. Dumping cold salsa over warm rice ruins the texture of both ingredients immediately.
Food safety matters just as much as texture. The USDA Food Safety and Inspection Service guidelines on leftovers recommends keeping cooked meat in a refrigerator at 40°F or colder for three to four days. If you prep for five full days, freeze your Friday portion on Sunday, then move it to the fridge on Wednesday night to thaw safely.
Container Tech: Why Your Hardware Dictates Your Results
Old takeout boxes and thin plastic tubs ruin good food. Thin plastic warps, leaks juices inside your bag, and absorbs strong cumin and garlic odors that survive every dishwasher cycle.
Switch to borosilicate glass dishes with snap-locking lids and silicone seals. Glass stays odor-free, resists red chile stains, and moves from the fridge to the microwave without warping. If you prefer to pack everything in one unit, choose two-compartment glass containers to keep warm grains separate from crisp toppings.
If you want to expand your weekly cooking lineup, check out our guide to Meal Prep Recipes That Last All Week Without Getting Boring for more simple routines that keep lunches interesting.
Recipe 1: Classic Chipotle Lime Flank Steak Bowls
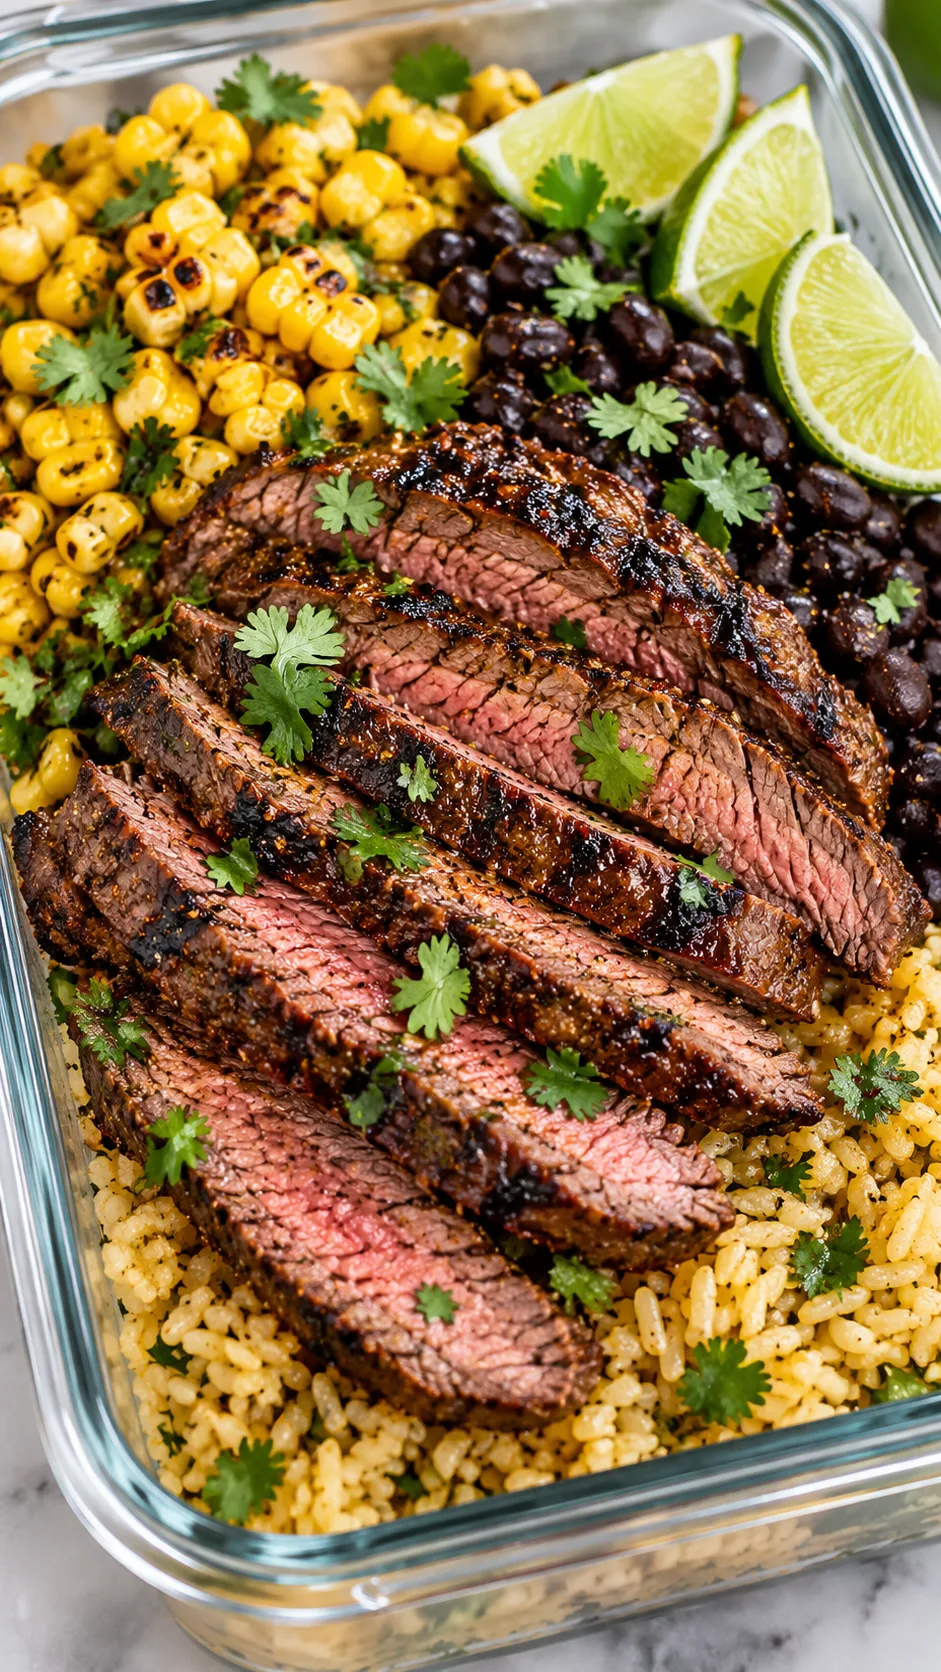
Flank steak delivers deep beef flavor with very little fat, making it an ideal choice for healthy work lunches. A quick sear over intense heat gives the steak a caramelized crust while keeping the center tender, so the meat will not dry out when you reheat it at work.
Ingredients (Makes 4 Servings)
- 1.5 lbs flank steak, trimmed of exterior fat
- 2 tablespoons adobo sauce (from a can of chipotle peppers)
- Juice of 2 large limes
- 3 cloves garlic, finely minced
- 1 teaspoon ground cumin
- 1 teaspoon smoked paprika
- 1 teaspoon kosher salt
- 3 cups cooked brown rice or white basmati rice
- 1 can (15 oz) black beans, rinsed and thoroughly drained
- 1 cup charred corn kernels (frozen, thawed, and roasted in a dry skillet)
- 1/2 cup fresh cilantro, chopped
Preparation Instructions
- Whisk the adobo sauce, lime juice, minced garlic, cumin, paprika, and kosher salt in a wide bowl. Coat the flank steak in the marinade and rest it on the counter for 20 minutes.
- Heat a cast-iron skillet over high heat until you see light smoke. Add a splash of avocado oil, then lay the steak into the pan.
- Sear the steak for 4 to 5 minutes without shifting it, letting a deep crust develop. Flip the steak and sear for another 3 to 4 minutes until an instant-read thermometer reads 130°F for medium-rare.
- Move the steak to a cutting board and rest it for 10 minutes. Slicing immediately causes the internal juices to run out onto the board.
- Slice the meat thinly across the grain at a slight angle.
- Divide the rice, black beans, and charred corn among four glass dishes. Top each portion with the sliced steak and chopped cilantro.
- Seal the lids tightly. Pack salsa in separate side containers.
Recipe 2: Fire-Roasted Salsa Verde Shredded Chicken Bowls
Boneless chicken breast often turns dry and stringy by midweek. Simmering the meat in acidic tomatillo salsa verde solves that problem. The shredded chicken absorbs the cooking juices and stays moist through Friday.
For more ways to streamline poultry during weekly prep, read our guide to Chicken Meal Prep Recipes That Keep You Full All Week Without Getting Boring.
Ingredients (Makes 4 Servings)
- 1.75 lbs boneless, skinless chicken breasts
- 1 jar (16 oz) fire-roasted salsa verde
- 1 teaspoon ground coriander
- 1 teaspoon dried Mexican oregano
- 1/2 teaspoon onion powder
- 1 teaspoon sea salt
- 3 cups cooked cilantro-lime white rice
- 1 can (15 oz) pinto beans, rinsed and warmed with a pinch of cumin
- 1 large red bell pepper, sliced and quickly sautéed in olive oil
- 1 medium zucchini, diced and pan-seared until tender-crisp
Preparation Instructions
- Place the chicken breasts into the bottom of a slow cooker or Dutch oven. Pour the salsa verde over the top, then sprinkle on the coriander, oregano, onion powder, and sea salt.
- If using a slow cooker, cover and cook on LOW for 4 hours (or HIGH for 2.5 hours). If using a stove-top Dutch oven, cover and simmer over medium-low heat for 25 minutes until the chicken reaches an internal temperature of 165°F.
- Transfer the chicken to a plate. Shred the meat into bite-sized strands using two forks.
- Return the shredded meat to the warm sauce in the pot. Let it sit for 10 minutes to absorb the cooking juices.
- Portion the cilantro-lime rice into four containers. Arrange the shredded chicken, pinto beans, red bell peppers, and zucchini neatly over the rice.
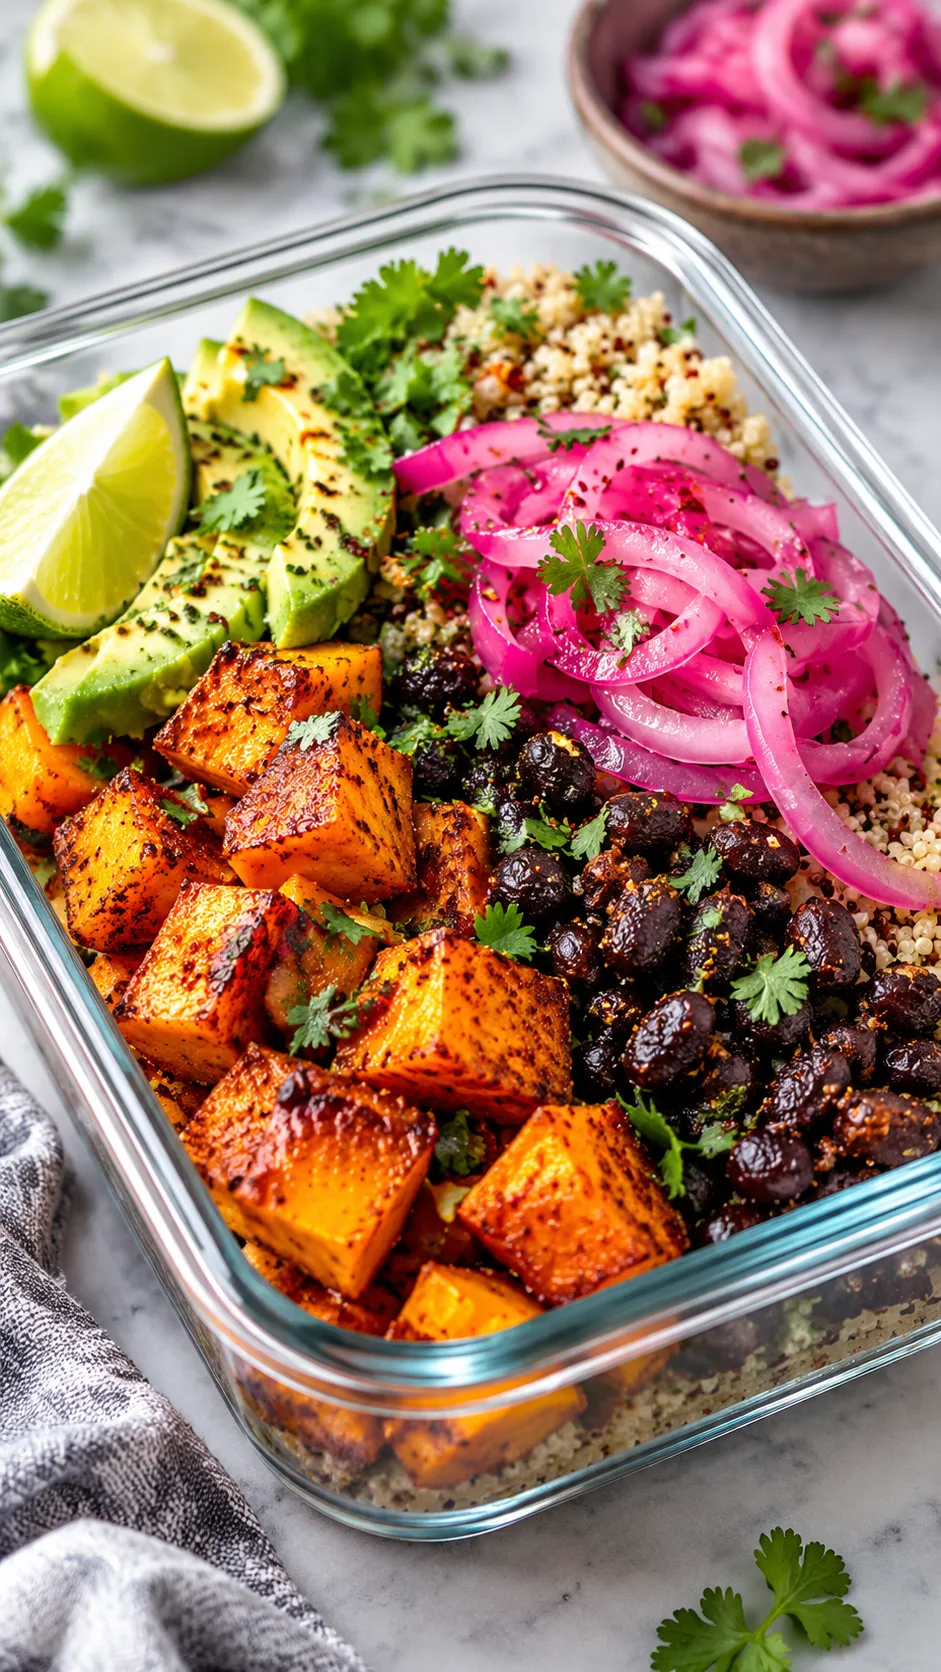
Recipe 3: Crispy Sheet-Pan Black Bean & Roasted Sweet Potato Bowls
Sweet potatoes provide a hearty base for meatless prep. High-heat roasting caramelizes their edges and softens their centers. Paired with crunchy black beans and fluffy quinoa, this recipe yields a filling lunch loaded with fiber and complex carbs.
Ingredients (Makes 4 Servings)
- 2 large sweet potatoes, peeled and cut into 1/2-inch uniform cubes
- 2 cans (15 oz each) black beans, rinsed, drained, and thoroughly patted dry with paper towels
- 2 tablespoons extra virgin olive oil
- 1.5 tablespoons chili powder
- 1 teaspoon ground cumin
- 1/2 teaspoon garlic powder
- 1/2 teaspoon cayenne pepper (optional for heat lovers)
- 1 teaspoon coarse kosher salt
- 3 cups cooked tricolor quinoa
- 1/2 cup pickled red onions (for serving cold)
Preparation Instructions
- Heat your oven to 425°F (220°C). Line a rimmed baking sheet with parchment paper.
- Spread the sweet potato cubes across one half of the pan and the dry black beans across the other half. Dry beans roast much crisper, so blot off all surface water with paper towels first.
- Drizzle the oil over the potatoes and beans. Sprinkle on the chili powder, cumin, garlic powder, cayenne pepper, and salt. Use your hands to toss everything until the spices coat each piece.
- Roast for 25 to 30 minutes, shaking the pan once midway through. The sweet potatoes should yield easily to a fork with browned edges, while the black beans turn crisp.
- Divide the cooked quinoa across four meal prep containers. Arrange the roasted sweet potatoes and black beans over the quinoa.
- Pack the pickled red onions in small separate cups to add after reheating your lunch.
Recipe 4: Zesty Garlic-Herb Ground Turkey & Cauliflower Rice Bowls
Ground turkey and cauliflower rice give you a light, satisfying lunch with minimal carbohydrates. Cooking cauliflower rice requires care, because excess moisture can ruin the texture. Never steam or boil riced cauliflower under a lid. Sauté it in an uncovered, smoking skillet so moisture evaporates instantly, leaving the vegetable tender and slightly crisp.
If you need more wholesome weekday options, browse our list of 15 Healthy Meal Prep Ideas for simple planning inspiration.
Ingredients (Makes 4 Servings)
- 1.5 lbs 93% lean ground turkey (lean, but retains enough fat to stay juicy)
- 1 medium yellow onion, finely diced
- 4 cloves garlic, crushed and minced
- 2 tablespoons tomato paste
- 1 tablespoon ground cumin
- 1 tablespoon chili powder
- 1 teaspoon dried oregano
- 1/2 teaspoon red pepper flakes
- 1 teaspoon fine sea salt
- 1/2 cup low-sodium chicken broth
- 4 cups raw cauliflower rice (fresh riced cauliflower yields the crispiest texture)
- 1 tablespoon avocado oil
- Juice of 1 lime
Preparation Instructions
- Warm a skillet over medium-high heat. Add a teaspoon of oil and the diced onion. Cook for 3 minutes until soft.
- Add the ground turkey to the pan. Break the meat into small pieces with a wooden spoon. Cook for 6 to 7 minutes until the pink color disappears.
- Push the cooked turkey toward the edges of the pan to create an open space in the center. Add the tomato paste and garlic to the cleared area. Cook them for 60 seconds until fragrant, then fold them into the meat.
- Add the cumin, chili powder, oregano, red pepper flakes, and salt. Pour in the broth, scrape up any browned bits from the pan floor, and simmer until the liquid thickens into a light sauce (about 3 minutes). Take the pan off the heat.
- Place a separate skillet over high heat. Add the avocado oil and cauliflower rice. Stir constantly for 4 to 5 minutes without a lid so steam escapes freely. Finish with fresh lime juice and salt.
- Assemble four containers by pairing equal portions of seasoned ground turkey with the cooked cauliflower rice.
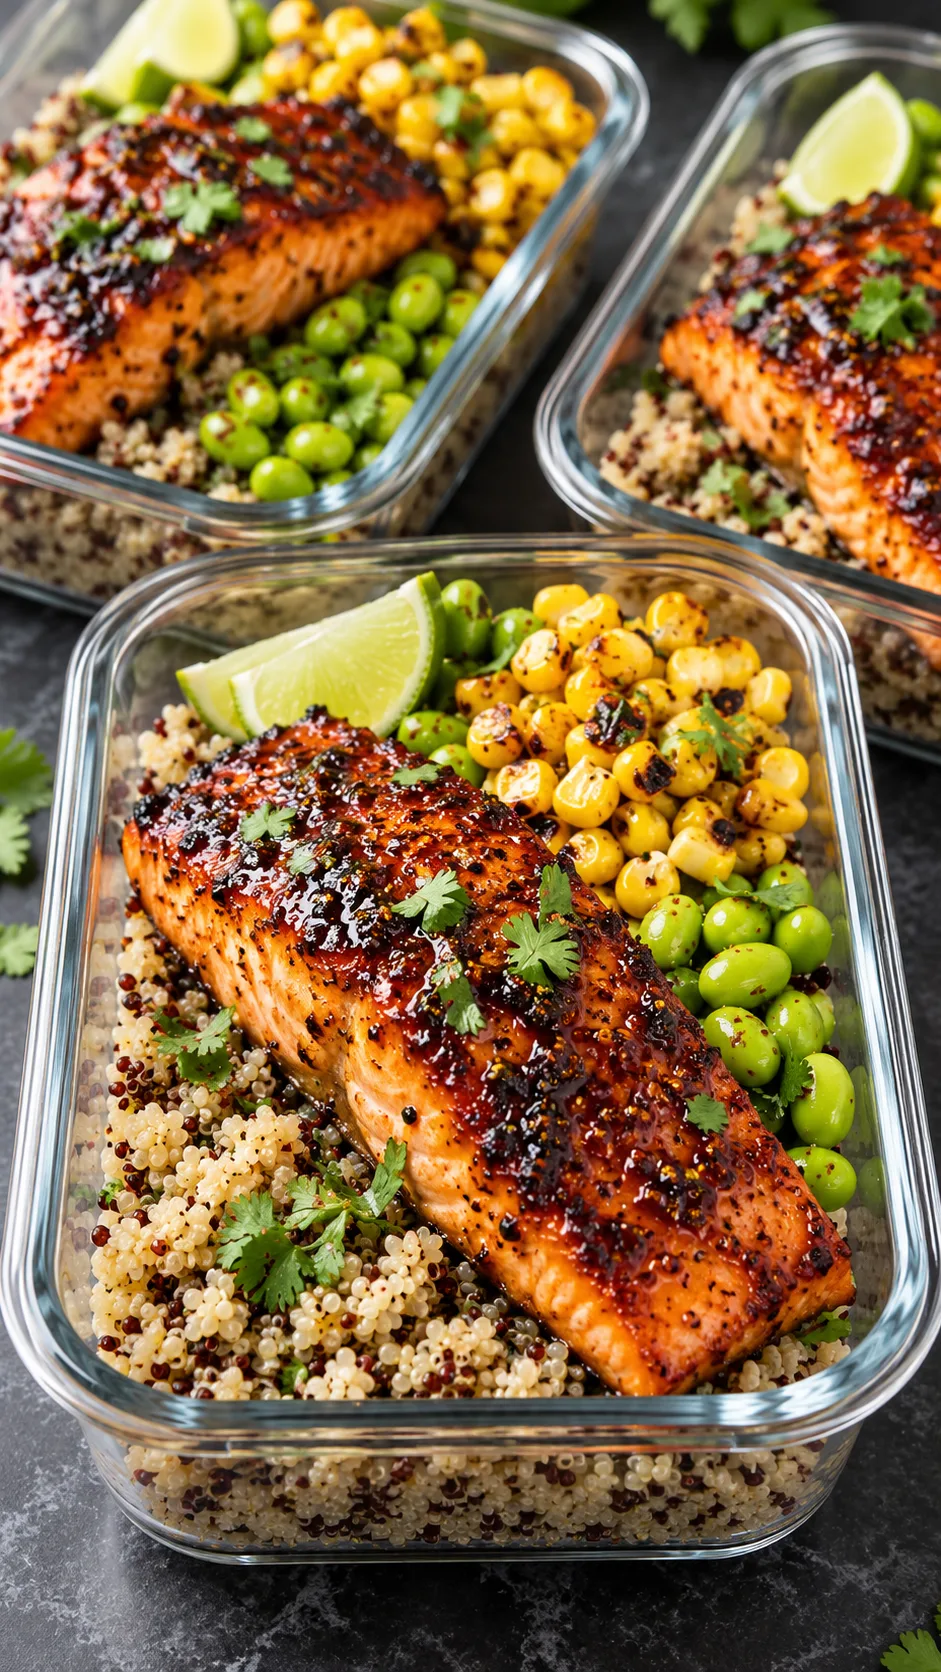
Recipe 5: Smoky Honey-Chipotle Salmon & Quinoa Bowls
You can pack fish for lunch without creating strong odors in the office, provided you pick a sturdy variety like salmon and warm it gently. Salmon contains plenty of omega-3 fatty acids, holds its texture in the fridge, and tastes great warm or chilled.
Ingredients (Makes 4 Servings)
- 4 skin-on wild salmon fillets (approx. 6 oz each)
- 2 tablespoons raw honey
- 1 tablespoon minced chipotle pepper in adobo sauce
- 1 tablespoon extra virgin olive oil
- 1 teaspoon smoked sea salt
- 1/2 teaspoon cracked black pepper
- 3 cups cooked white or red quinoa
- 1 cup steamed shelled edamame (for an extra crunch and clean protein boost)
- 1 cup fire-roasted sweet corn
- Fresh lime slices for garnish
Preparation Instructions
- Heat your oven to 400°F (200°C) and line a baking sheet with parchment paper.
- Pat the salmon dry using paper towels. Whisk the honey, chipotle pepper, olive oil, smoked salt, and black pepper together in a small dish.
- Brush the glaze evenly over the top of each salmon fillet.
- Bake for 12 to 14 minutes, depending on thickness, until the salmon flakes under light pressure. Aim for an internal temperature of 125°F to 130°F so the fish stays tender when reheated.
- Cool the fillets on your counter for 15 minutes.
- Spoon the cooked quinoa into four meal prep dishes. Stir the edamame and sweet corn into the quinoa. Set one salmon fillet on top of each grain portion.
- Seal the containers and refrigerate them promptly. Eat your salmon bowls within three days for the freshest quality.
Mastering the Sauces: 3 Dressings That Never Water Down
A great dressing pulls the whole bowl together. Bottled sauces often contain cheap vegetable oils, added sugar, and artificial thickeners that mask real flavor. These three homemade dressings stay creamy and stable for up to seven days in your refrigerator.
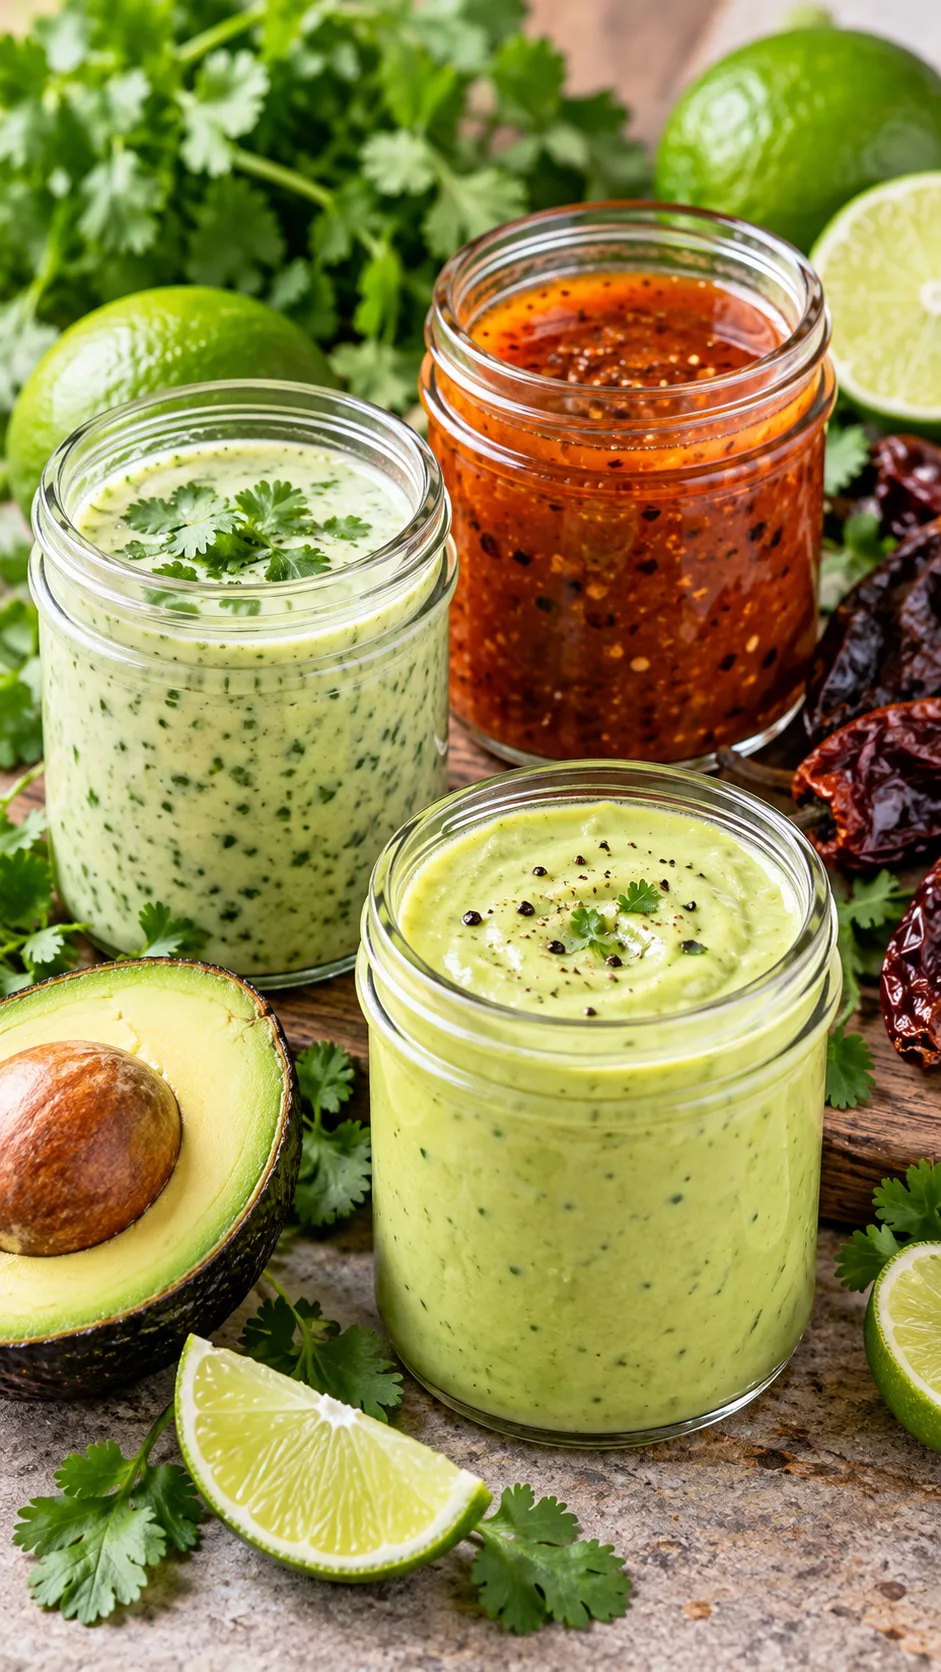
- High-Protein Cilantro Jalapeño Crema: Combine 1 cup plain nonfat Greek yogurt, 1 cup fresh cilantro leaves, 1 seeded jalapeño, juice from 2 limes, 1 garlic clove, and 1/2 teaspoon salt in a blender. Puree until smooth. Greek yogurt adds thickness, a clean tang, and extra protein without the heavy saturated fat of sour cream or mayonnaise.
- Zesty Cumin-Chipotle Lime Vinaigrette: Whisk 1/3 cup extra virgin olive oil, 3 tablespoons lime juice, 1 tablespoon apple cider vinegar, 1 tablespoon adobo sauce, 1 teaspoon Dijon mustard (this binds the oil and acid together), 1 teaspoon honey, and a pinch of cumin. This sharp dressing balances richer proteins like steak and turkey.
- Velvety Dairy-Free Avocado Dressing: Avocado dressing turns brown when it lacks acid. Blend 1 ripe avocado, 1/4 cup unsweetened almond milk, 3 tablespoons lime juice (the citric acid stops discoloration), 1/4 cup cilantro, and 1/2 teaspoon garlic salt. Store this smooth dressing in a glass jar, pressing plastic wrap directly against the top surface before screwing the lid on tightly.
Helpful Video Guide: Visualizing Your Prep Setup
Watch this video walkthrough to see smooth bowl prep and assembly in real time:
The Reheating Playbook: Don’t Ruin Your Hard Work
You spent time cooking and layering your meals. Avoid ruining that effort by blasting the container on high heat until the meat turns rubbery.
Microwaves warm water molecules unevenly. Intense microwave heat turns avocado brown, softens crisp greens into sludge, and dries out chicken breast quickly. Use this step-by-step heating method instead:
- Extract the Cold Toppings: Remove your side cup of sauce, salsa, and fresh herbs before you start the microwave.
- Add a Splash of Moisture: Spoon one teaspoon of water or chicken broth over the rice and meat. This creates light steam, softening the grains and protecting the meat from dry heat.
- Lower the Microwave Power: Turn the microwave down to 70% power. Heat the container in 60-second bursts, stirring once halfway through. Gentle heat keeps cooked meats tender.
- Garnish and Crunch: After heating the base, spoon your cold salsa and cilantro-jalapeño crema on top. Add crushed tortilla chips or toasted pumpkin seeds right before eating for fresh crunch.
Nutritional Breakdown: How These Bowls Fuel Your Goals
Taco bowls offer balanced nutrition without complicated measuring. Pairing unrefined whole grains with lean meats and healthy fats from avocado or olive oil keeps you full for hours. Research from the Harvard T.H. Chan School of Public Health confirms that whole grains and fiber-dense foods stabilize blood sugar and prevent midday energy crashes.
Here is the nutritional profile per serving for each recipe:
- Chipotle Flank Steak Bowl: 480 Calories | 42g Protein | 46g Carbs | 14g Fat | 8g Fiber
- Salsa Verde Chicken Bowl: 420 Calories | 45g Protein | 44g Carbs | 7g Fat | 7g Fiber
- Sweet Potato & Black Bean Bowl: 390 Calories | 14g Protein | 64g Carbs | 9g Fat | 13g Fiber
- Turkey & Cauliflower Rice Bowl: 330 Calories | 38g Protein | 16g Carbs | 12g Fat | 5g Fiber
- Smoky Honey Salmon Bowl: 510 Calories | 39g Protein | 42g Carbs | 19g Fat | 6g Fiber
Frequently Asked Questions About Taco Bowl Meal Prep
Can I freeze these taco bowls for later?
Yes, but freeze the grains and cooked meats only. Cooked steak, chicken, beans, brown rice, and quinoa freeze cleanly for up to three months. Avoid freezing fresh produce, greens, tomatoes, or dairy sauces, because their cell walls collapse during thawing and release excess liquid. Defrost your grains and protein in the refrigerator overnight before heating.
How do I stop my cut avocado from turning brown in my lunch box?
Avocados turn brown when oxygen reacts with enzymes in the fruit flesh. To stop this reaction, coat all exposed surfaces with fresh lime juice. Wrap the piece firmly in plastic wrap with no trapped air, or bring a whole avocado to work and slice it right before your meal. Slicing it fresh takes seconds and keeps the texture firm.
What are the best low-carb substitutes for rice?
Fresh riced cauliflower works best, though you can also use shredded cabbage ribbons, riced broccoli, or crisp shredded romaine lettuce for a cool taco salad base. Always keep lettuce separate from warm ingredients and never heat it.
How long will the fresh pico de gallo stay crisp?
Fresh pico de gallo stays crisp for about three days. Over time, salt draws water out of diced tomatoes and pools at the bottom of the dish. To preserve crispness for five days, scoop the watery gel and seeds out of the tomatoes before dicing the firm walls. You can also store the salsa in a small strainer placed inside a sealed container so excess juice drains away from the solids.
Final Takeaway: Take Control of Your Weekday Lunches
Weekly meal prep does not require endless hours in the kitchen or dry, uninspired food. A thoughtful layering order, quality glass containers, and these five flavor-packed recipes will keep your lunches fresh and enjoyable from Monday through Friday.
Pick one recipe this week, pick up the ingredients, and spend forty-five minutes cooking. Your wallet and your afternoon energy will reward you every day at lunchtime.